

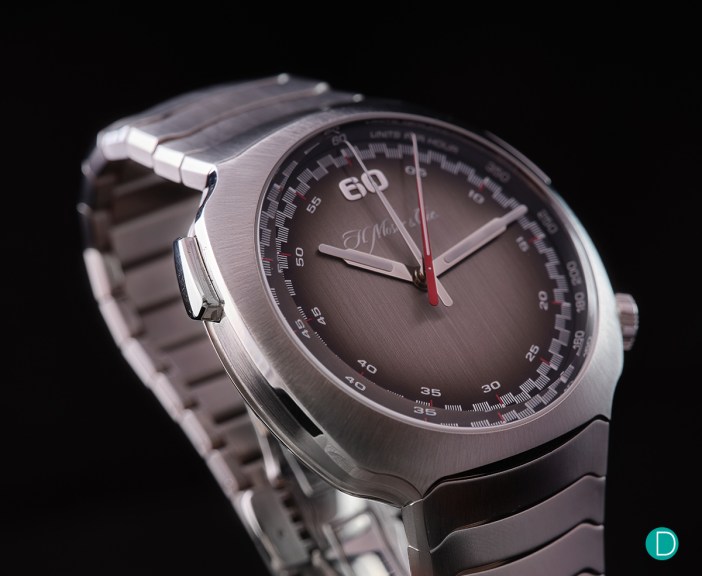
Since we began the series of Chillout TGIF series on Photography, we have had some requests to share how we process the images for web publication. Here is a walkthrough of our photography workflow.
We publish our web images with a constant width, namely 1200 pixels across. We used to use 1024 as the standard, with 1920 used for Watchscape wallpapers, but since 2019, we decided to increase the size with the prevalence of higher resolution devices to 1200 for the regular images, and 2560 for wallpapers.
Tools of the trade
I shoot all our images in camera raw, but and even with the lowest resolution camera we have on hand, a 10 year old Panasonic Lumix GH2 at 16 Mp produces an image which is 4608 x 3456, while needing only 2560 for Watchscapes and 1200 for regular photographs on these pages. And I also regularly use my even older Hasselblad H3D-39 which produces images which are 7216 x 5412. The highest resolution camera I have shot with recently is with the Phase One IQ4 150 with an image which is 14204 x 10652.

Hence, a two step process is essential to our photography workflow. First step is to convert the files from camera raw to jpeg. And the second is to resize, and touch up the images.
Raw conversion: Adobe Camera Raw, Hasselblad Phocus and Capture One
Our basic toolset comprise of the Adobe CC suite of applications. The Adobe CC suite is a full function suite of software which allows very advanced image manipulation in the hands of a skilled operator. We license the Photography Suite at a monthly price of S$13/month, and with it we have access to Bridge(Br), Adobe Camera Raw (ACR) and Photoshop(Ps), amongst others. We use Br, ACR and Ps extensively.

Some photographers prefer to use Lightroom (Lr) (also packaged within the Adobe CC Suite) as the all encompassing app in their image processing workflow. It does raw conversion, and features advanced features like layers and masks. And have quite powerful database capabilities. Many photographers use only Lr for their workflow, with good results. Personally, I find LR to be awkward to work with, as the user interface is unfamiliar as it is a carryover from Apple’s old Aperture, and prefer to process the files in a two step approach.
For my photography workflow, I prefer to use Adobe Bridge as a file manager, and Adobe Camera Raw to convert the raw files. I use Adobe Camera Raw for all images, except for those photographed with Hasselblad, Fujifilm and Phase One. ACR is used to convert the raw files from the Panasonic and Leica cameras.

Hasselblad and Fujifilm files can be processed with the Adobe Suite, but I find that the results from Phocus for Hasselblad and Capture One Express for Fujifilm is better. Note that though Capture One Express is a free product, the full featured version of Capture One Fujifilm is licensed separately. Capture One Fujifilm Express is sufficient for most purposes have all the conversion features, lacking only in the more advanced features in the full version. Full Capture One licenses are available for most cameras, including Panasonic and Leica. But in medium format, only Fujifilm is supported.
The Adobe Suite is not able to process Phase One files, and Capture One is needed. Phase One supplies a full perpetual version of Capture One DB with each back sold. However, the DB version is only able to work with Phase One files.

The camera raw files are almost always processed in the chosen raw converter (ACR, Phocus, or Capture One) with adjustments for exposure, taking care of highlights, shadows, contrast and black levels. Usually no sharpening is applied at this stage. Medium format sensors do not have an IR filter, and are inherently sharper than the images from smaller format sensors which do. For the Panasonic files, a small amount of input sharpening is applied. But for Leica, Hasselblad, Fujifilm and Phase One files, none is applied.
All the raw converters (ACR, Phocus, Capture One) have technology which incorporates digital correction for the lens used, and where available, I use them. The final output is a full sized 8 bit jpeg file. The workflow for print is different, and the output file is usually a 16 bit tiff file.
Image touchups: Adobe Photoshop 2020
The full sized jpeg is then opened in Ps for further processing. The first step is to check for and remove image defects. These defects are usually dust and dirt which may have clung to the watch, and not properly cleaned. Touch-ups are done at full image size with the Spot Healing Brush Tool or the Clone Tool. Unwanted reflections on the case or crystal are removed at this stage in the workflow.

The next step is a levels adjustment via the Curves Tool. The image is then cropped as desired. Cropping is an aesthetic exercise, and allows the photographer to focus attention and isolate certain features on parts of the photograph.
Next step in the photography workflow is to resize the image to the correct image dimensions for display, and to apply output sharpening. Resizing is done with the Ps Image Size Tool. The defaults are used, as Ps is pretty good at figuring out the down-ressing algorithm.
Output Sharpening
Output sharpening is the next essential step in the workflow, and the sharpening method and amount will depend on the intent of the final image. The output sharpening for web images is different from that for prints. Output sharpening is the final step in our image processing workflow. For images used on this website, the method I select is to be the least destructive possible.

First a duplicate layer is created. And that layer is desaturated, and a High Pass Filter applied. Typical values for the High Pass Filter is a radius of 0.7 to 1.1, depending on the amount of sharpening required. The image property is then changed to soft light blend mode. This sharpens the images only where edges show up on the image.
I then add our watermark, which is a png file as a layer over. And collapse the layers, and safe as the final image. This final image is uploaded to our servers, and is what you see on this website.
Concluding thoughts
Here I have shared with you the photography workflow we employ to produce the images for this website. All the steps are used as a guide, though the formula is more or less fixed, I might exercise creative adjustments as necessary.

Try it out on your own images. Show these in Instagram and tag us @deployant with the #deployantphotoworkflow.


